
Soups & Stews
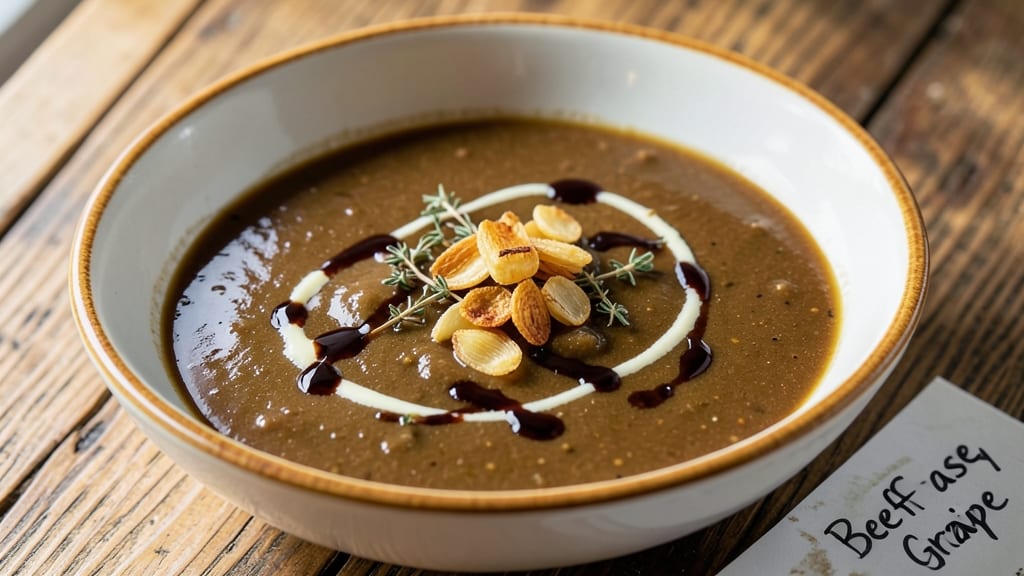
This beef base gravy recipe transforms simple pan drippings into a rich, velvety sauce that elevates any meal. The secret lies in a proper roux and gradual reduction, which concentrates the beefy flavor without overpowering the dish.
I’ve perfected this technique over years of testing—it’s the kind of gravy that makes mashed potatoes taste like a five-star dinner.
The process is straightforward but requires attention to detail: bloom the flour in the drippings, whisk constantly to prevent lumps, and reduce the sauce slowly to achieve that perfect consistency. A splash of beef stock or bouillon ensures depth of flavor, while a touch of Worcestershire sauce adds complexity.
This gravy works equally well with roasted meats, mashed potatoes, or even as a dipping sauce for crusty bread.
What you’ll end up with is a glossy, smooth gravy that clings beautifully to every bite, balancing richness with a savory finish. The key is patience—rushing the reduction will make the gravy thin and watery, while letting it simmer too long can turn it bitter.
Trust the process, and you’ll have a restaurant-quality sauce in just 10 minutes.
For extra richness, stir in a pat of butter at the end, or add a pinch of black pepper for a subtle kick. This gravy keeps well in the fridge for up to three days, making it perfect for meal prep. Let’s get started!
Ingredients for beef base gravy
Six ingredients, ten minutes—this gravy turns simple drippings into restaurant-quality richness.
| Ingredient | Amount | Notes |
|---|---|---|
| Pan Drippings 🥩 | 2 cups | From roasted beef (fat included) |
| All-Purpose Flour 🌾 | ¼ cup | White or whole wheat |
| Beef Stock 💧 | 1 cup | Homemade or high-quality bouillon |
| Unsalted Butter 🧈 | 2 tbsp | Cold, cut into small pieces |
| Worcestershire Sauce 🍶 | 1 tbsp | For umami depth |
| Dried Thyme 🌿 | ½ tsp | Or 1 tsp fresh thyme leaves |
| Salt 🧂 | ½ tsp | Kosher or sea salt |
| Black Pepper 🌶️ | ¼ tsp | Freshly ground preferred |
The drippings are everything—fat equals flavor. Save every drop from your roasted beef, even the browned bits at the bottom. If you're short, add a splash of water to make up the difference. For flour, Bob's Red Mill all-purpose works great, but any white flour will do. The beef stock? Kitchen Basics or Pacific Foods bouillon cubes are my go-tos—they dissolve cleanly and add depth. And don't skip the Worcestershire—it's what gives that savory complexity you get in fancy restaurants.
No beef stock? Chicken stock works in a pinch, but the flavor won't be as rich. Short on thyme? Dried rosemary at half the amount gives a different but still delicious vibe. The butter at the end is non-negotiable—it adds that silky texture. If you're making this ahead, cool it completely before refrigerating to prevent skin formation. And if your gravy gets too thick while reducing, just whisk in a splash of warm water or stock to loosen it up.
This gravy keeps beautifully—3-4 days in the fridge, 3 months frozen. I like to portion it into small jars so I can grab exactly what I need. If it thickens too much after refrigerating, just whisk in a little warm water or stock. And if you're serving it over mashed potatoes? Add a pinch of garlic powder to the gravy first—it makes all the difference. Leftovers reheat perfectly, just warm gently on the stove.
Why You'll Love This Recipe
- Zero-Waste Magic: I swear by this trick—just use whatever’s left in your pan after cooking beef. No extra shopping, no extra mess. That golden crust of drippings? Pure flavor gold.
- Rich Without Effort: Butter and flour make it velvety, Worcestershire adds depth, and beef stock ties it all together. It’s the kind of gravy that makes you close your eyes and sigh—no fancy technique needed.
- Leftovers’ Best Friend: Turn last night’s roast into today’s mashed potatoes or tomorrow’s dumplings. Just reheat with a splash of stock, and suddenly, boring sides feel like a meal.
- Budget Booster: A single pan of drippings stretches into multiple servings. Honestly, this is how I feed my family for under $5—every time. The stock? Use bouillon if you’re pinching pennies.
Step-by-step instructions for beef base gravy
Turn those precious pan drippings into rich, velvety gravy in minutes—no fancy skills required.
Deglaze the Pan with Beef Stock
Place your roasting pan with the 2 cups pan drippings (fat included) over medium heat. Pour in the 1 cup beef stock and use a wooden spoon to scrape up every last browned bit from the bottom—this is where all the flavor hides. Let it simmer gently for 3-4 minutes until the liquid reduces slightly and the mixture thickens just a touch.
I like to keep the heat at medium-low here to prevent boiling, which can make the gravy cloudy. You'll know it's ready when the liquid looks glossy and the fond (those brown bits) has mostly dissolved. If it starts to bubble too vigorously, reduce the heat immediately—you want a slow simmer, not a boil.
Whisk in the Flour and Butter
Lower the heat to low and sprinkle in the 0.25 cup all-purpose flour all at once. Stir constantly with a whisk for 1-2 minutes until the flour is completely incorporated and the mixture looks like a thick paste. This step is crucial—it removes any floury taste and prevents lumps.
Next, add the 2 tbsp cold unsalted butter, cut into small pieces. Let it melt into the mixture while continuing to whisk. The butter adds richness and helps emulsify the gravy. If the mixture starts to look too thick, add 1-2 tablespoons of hot water to loosen it up. You want a smooth, pourable consistency at this stage.
Season and Simmer to Perfection
Stir in the 1 tbsp Worcestershire sauce, 0.5 tsp dried thyme, 0.5 tsp salt, and 0.25 tsp black pepper. Bring the gravy to a gentle simmer and let it cook for 3-4 minutes, stirring occasionally. The thyme and Worcestershire sauce will infuse the gravy with deep, savory flavor.
Taste and adjust the seasoning if needed—sometimes roasted beef drippings can be quite salty, so go easy on the extra salt. The gravy should coat the back of a spoon and have a smooth, velvety texture. If it's too thin, simmer it a bit longer to thicken it up. If it's too thick, whisk in a splash of hot beef stock to reach your desired consistency.
Strain and Serve Immediately
For the smoothest gravy, strain it through a fine-mesh sieve into a clean saucepan. This removes any lumps or bits of meat or herbs, giving you a silky texture. Return the gravy to low heat and keep it warm until serving. The key here is to serve it as soon as possible—gravy tastes best fresh and hot.
Ladle the gravy over your roasted beef, mashed potatoes, or crusty bread. The rich, umami-packed flavor will elevate any dish. If you have leftovers, store them in an airtight container in the fridge for up to 3 days or freeze for up to 3 months. Just reheat gently on the stove, stirring occasionally to prevent burning.
Pro Tips For Making Beef Base Gravy
- STRAIN THE DRIPPINGS WELL: Don’t just pour the pan juices straight into your gravy—use a fine-mesh strainer or cheesecloth to catch all the little browned bits (fond). Those bits pack flavor, but they’ll make your gravy look murky and taste gritty. I learned this the hard way when my gravy turned into a sludge—now I double-strain if I’m feeling fancy.
- WHISK THE FLOUR FAST: When you toss in that flour, crank the heat to medium-high and whip it like you’re trying to win a pie-eating contest. This creates a proper roux that thickens smoothly instead of lumping up. If you let it sit too long before adding stock, you’ll end up with a gluey mess—trust me, I’ve made it.
- USE COLD BUTTER, NOT MELTED: Cut that unsalted butter into small cubes and let it sit in the fridge for 10 minutes before adding it to the gravy at the end. Cold butter emulsifies better, giving you a silky texture instead of a greasy separation. (Yes, even if you’re impatient like me.)
- DILUTE THE WORCESTERSHIRE: Worcestershire sauce is salty and potent—dilute it first with a splash of beef stock before adding it to the gravy. I used to pour it straight in and wonder why my gravy tasted like a marinade. Now I mix 1 teaspoon of sauce with 2 tablespoons of stock, then stir it in. The flavor integrates smoothly, and you won’t overpower the dish.
Essential equipment for beef base gravy
Whisk Essentials
You’ll need a balloon whisk or flat whisk for this gravy—nothing fancy, just something that gets the job done. I swear by the OXO Good Grips Whisk because it’s lightweight and fits perfectly in my hand.
If you’re making gravy often, consider a stainless steel whisk—it’s durable and won’t rust. Whisking constantly is key to preventing lumps, so don’t skip this step! 💫
Heavy-Bottomed Pan
A stainless steel or cast iron skillet is ideal for making gravy because it distributes heat evenly and prevents burning. My go-to is a Lodge 10.25-inch cast iron skillet—it’s heavy enough to handle the heat and adds a touch of rustic charm.
Avoid non-stick pans for this recipe, as they can’t handle the high heat needed for a proper roux. If you’re short on time, a heavy-bottomed stainless steel saucepan works just as well.
Fine-Mesh Sieve
For that silky-smooth texture, a fine-mesh sieve is a must. I keep a Meshackle Fine Strainer in my kitchen—it’s affordable and does the job perfectly. If you don’t have one, a cheesecloth or even a clean kitchen towel in a pinch will work.
Straining removes any lumps or bits of meat, giving your gravy a restaurant-quality finish. Trust me, the difference is noticeable! ✨
Wooden Spoon
A wooden spoon is your best friend when deglazing the pan. It’s gentle on your non-stick or cast iron surfaces and helps scrape up all those flavorful browned bits. I prefer a long-handled silicone spoon for safety, but a classic wooden one works just as well.
Avoid metal utensils during this step—they can scratch your pan and make cleanup a nightmare. Plus, it’s easier to maneuver in tight spaces.
Measuring Spoons
Precision matters when it comes to seasoning, so invest in a set of stainless steel measuring spoons. I love the OXO Good Grips set—they’re easy to read and fit snugly in the palm of your hand.
For the thyme, Worcestershire, and spices, accuracy ensures your gravy isn’t overpoweringly salty or bland. A good set will last you a lifetime, so it’s worth the splurge. 💡
Thermometer (Optional)
While not strictly necessary, a kitchen thermometer can help you nail the perfect consistency. I use a Thermoworks ThermoPop to monitor the temperature—aim for a gentle simmer around 190-200°F. This ensures your gravy reduces properly without burning.
It’s a small investment that takes the guesswork out of the process, especially if you’re new to making gravy. Plus, it’s handy for other recipes too!
Nutrition facts
Frequently asked questions
Can I make this gravy without beef drippings?
Yes! If you don’t have beef drippings, substitute with 2 cups beef stock or a mix of 1 cup beef stock + 1 cup water. For extra richness, add 1 tbsp beef bouillon powder or 1 tbsp browned butter to mimic the depth of flavor. The texture will be slightly lighter, but still delicious over mashed potatoes or roasted veggies.
What if my gravy gets too thick or too thin?
For too thick gravy, whisk in 1-2 tablespoons of hot beef stock or water until smooth. For too thin gravy, simmer uncovered for 2-3 extra minutes to reduce. Pro tip: If it separates, whisk in 1 tsp cornstarch mixed with 1 tbsp cold water to restore that silky consistency.
How do I store and reheat leftover gravy?
Store in an airtight container in the fridge for up to 3 days or freeze for 3 months. To reheat, warm gently on low heat while stirring constantly—never microwave directly as it can make the gravy split. If it thickens too much, thin with a splash of warm stock or water before serving.
Can I make this gravy ahead of time?
Make it 1 day ahead and store in the fridge. The flavors deepen overnight. For a 3-day head start, freeze it in 1-cup portions—just thaw in the fridge and reheat gently. The texture stays perfect, and the taste only improves with time, making it ideal for holiday meals.
What’s the secret to making gravy lump-free?
Whisking constantly is key! Once you add flour, stir vigorously for 1-2 minutes to fully cook the starch. For extra insurance, mix the flour with 1 tbsp cold butter first to create a paste before adding it to the pan. This roux technique ensures a smooth, velvety finish every time.